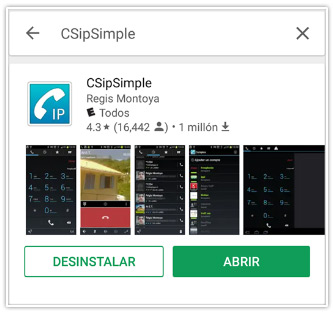
CSipSimple for Android
1. Download from Google Store
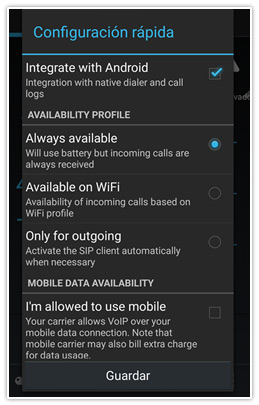
2. Once it is installed, open the app . It will ask you to select some options for a quick configuration, I chose the ones on the pic below and Click on “save”
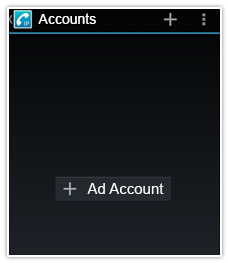
3. It will show the option “+Add Account”, tap there.
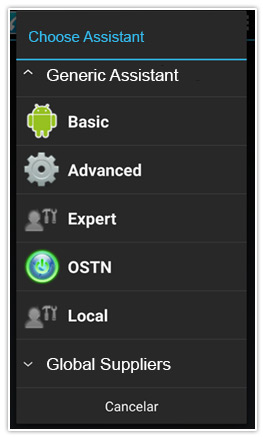
4. You will get a new window, please Select “Advanced”.
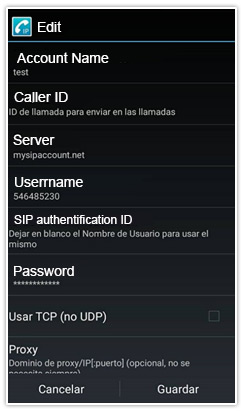
5. Enter an account name (any name) , your PIN number as username, the password and Server (mysipaccount.net) and Click on “Save”
» Instructions for getting your Domain, PIN, & Password
» Instructions for getting your Domain, PIN, & Password
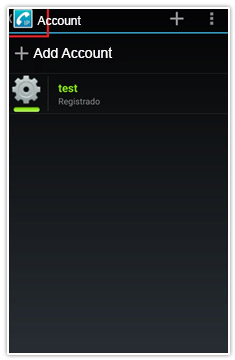
6. Now the account is registered, you can tap on the arrow showed below, go back a place a call.
We tested the same configuration on a Sony Xperia X1 and Sony Galaxy J5 (2016). We did not have to change anything else and I got good audio for outgoing and incoming calls.