
Need a cost-effective way to manage your inbound call flow and fluctuating call volumes? Simply, set up an auto-attendant to effectively manage incoming calls.
In this article, we’ll walk you through how to set up an auto-attendant and why businesses need it.
What is an Auto-Attendant?
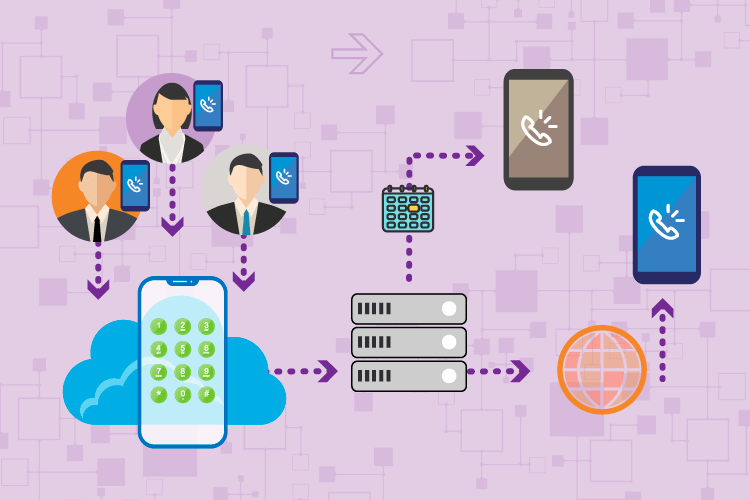
An auto-attendant is a cloud communication feature that automatically answers your inbound calls. It then gathers information from callers by providing them with a set of predetermined menu options and waiting for the caller’s input (on the keypad).
Based on their input, the auto-attendant routes callers to their desired department. In other words, this VoIP feature acts as a virtual receptionist or operator for your business and ensures callers arrive at the correct destination.
Example of an auto-attendant:
- Caller dials your business phone number.
- Auto-attendant answers the call and plays a preset greeting.
- Then, it asks the caller to press 1 for English or press 2 for Spanish.
- When the caller presses 1, it triggers English menu options.
- When the caller presses 2, it triggers Spanish menu options.
- If no option is selected, it repeats the message 5 times. After the 5th time, it ends the call.
Why Should Businesses Set Up An Auto-Attendant?
Many businesses set up auto-attendants to effectively control the way callers move through their phone system, manage fluctuating call volumes, and much more. Here are some reasons why businesses need this VoIP solution.
• Avoid missed calls as the auto-attendant immediately answers every inbound call, even during a volume surge. So, you can establish a reliable and consistent business phone system – allowing you to stay on top of incoming opportunities and sales.
• Customize menu options to align with your brand identity as well as customer needs using personalized greetings, menu prompts, messages, voicemails, and more.
• Save on costs associated with live receptionists, secretaries, and operators by automating call management.
• Improve caller experience by promptly answering calls and accurately routing callers to their desired destinations – decreasing wait and handling times.
• Increase accessibility using call forwarding and routing capabilities to provide 24/7 global customer support or after-hours services.
• Optimize team workloads since auto-attendant connects callers to the proper department or extension – minimizing the amount of irrelevant and repeat callers. This frees up your employees’ time, allowing them to focus on more complex tasks that require a human touch.
How to Set Up an Auto-Attendant
Now that we’ve covered the basics, let’s get into how to set up an auto-attendant for your business in a few simple steps:
- Get a Phone Service
- Design Your Call Flow
- Upload Custom Messages and Add Destinations
- Equip Actions and Triggers
- Configure Routing and Forwarding Rules
- Test Your Auto-Attendant
1. Get a Phone Service
To set up an auto-attendant for your business, you first need to get a phone service. There are many different providers on the market, so make sure you research to find the best solution for your specific needs.
When choosing a phone service provider, it’s (of course) important to find one that offers the auto-attendant feature. But you should also consider:
- How long they’ve been in the market
- If their pricing points match your budget and if they have any setup or hidden fees
- How quickly you can get set up
- What other features they offer
- How much uptime they guarantee and how reliable their service is.
After you find a provider, browse through their phone number inventory and select the phone number that best fits your communication needs. Then, sign up for the service and wait for your provider to activate it.
2. Design Your Call Flow
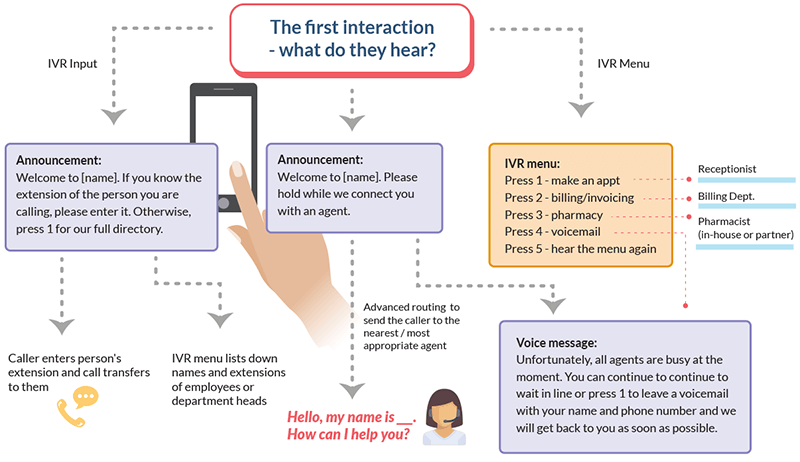
Next, develop your incoming call flow to visualize the way calls travel within your system. It’s important to take your time when outlining your call flow template, as a well-designed flow helps improve caller experience and increase efficiency.
Start by envisioning what you want to happen when a customer calls your business. And remember to focus your auto-attendant and call flows on the customer’s needs by factoring in recurring queries and key pain points. This way, callers can resolve their queries quickly and easily.
- When designing your call flow, consider the following:
- What greetings, messages, or prompts do you want the caller to hear?
- What menu options do you want to offer them? Will you include self-service options?
- Which departments and extensions will you include?
- How will they move down the call flow and find the right person to speak with?
- Are all of your menu options essential, and is there enough demand to include them?
- What happens if someone is unavailable or if the caller contacts your business after-hours?
3. Upload Custom Messages and Add Destinations
Setting up an auto-attendant is even easier when you prepare the necessary materials beforehand. This includes uploading custom voice messages and adding your destinations – which you’ll configure in your provider’s control panel.
Begin with drafting and recording scripts for your business’ greetings, prompts, and voicemails. You can do this in-house or outsource this task to professional services. Record these messages using a recording software or directly through your provider’s control panel. If you don’t want to record them in-house, you can buy recordings from audio providers. Once you have your recordings, upload these custom messages to your auto-attendant interface.
Next, it’s time to add all the destinations you plan to include when setting up your auto-attendant. You can add single phone numbers or create ring groups for different departments. And you can even add email addresses to forward faxes and voicemails.
4. Equip Actions and Triggers
Once you’ve planned and prepared the necessary materials, you’re ready to set up your call flow in the control panel. The auto-attendant’s available capabilities and action options will depend on what your provider offers.
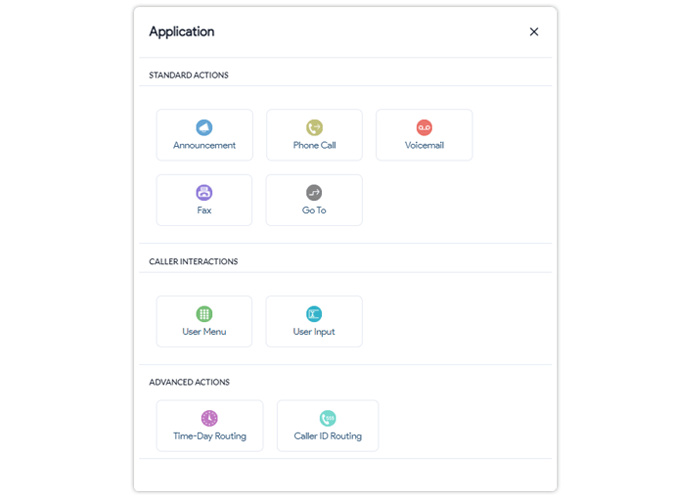
We offer many actions and triggers that help you quickly build simple to complex call flows. These options include:
- Announcement – to play a message or greeting
- Phone Call – to direct the call to a specific destination, individual, or department
- Voicemail – to forward calls to your voicemail
- Fax – to send incoming faxes to your email
- Go To – to redirect callers to a previous destination in your auto-attendant’s call flow, such as the main menu
- User Menu / User Input – to create a menu with voice messages and menu options for callers select
- Routing Actions – to route calls to alternate destinations depending on time of day or caller ID.
Each action and trigger comes with additional options, allowing you to configure further pathways. You can choose how basic or complex you want to go with an auto-attendant. And set up simple or multi-level auto-attendant phone menus, based on your requirements.
To avoid confusion or misconfiguration, remember to use the call flow you developed earlier to guide you through each step. This will help keep you focused on setting up an efficient auto-attendant that addresses the customer’s needs.
5. Configure Routing and Forwarding Rules
When equipping actions and triggers, you also have the option to configure routing and forwarding rules for your business. Customize these rules and apply them to your entire business or specific departments and individuals. Different routing and forwarding options enable your business to remain accessible to customers after-hours or provide 24/7 customer support.
Let’s take a look at different routing options Global Call Forwarding offers:
• Time-based Routing – direct calls to different destinations during a certain time of the day or period of time. (Used for: special holiday routing, after-hours services, and 24/7 support)
• Location-based / Caller ID Routing – route calls based on the incoming caller ID or location. (Used for: global customer support and connecting distributed teams)
• Failover Forwarding – to forward unanswered calls to an alternate destination. (Used for: backup support and building your system’s redundancy)
In addition to these, you can also set up other routing rules such as holiday routing, sequential forwarding, simultaneous ringing, etc. While you can easily configure these through the control panel, our tech support team is happy to help get you set up.
6. Test Your Auto-Attendant
After you finish configuring and setting up your auto-attendant, make sure to test your pathways. This way, you know that every action, trigger, and option works how you want them too. Evaluate your auto-attendant for unnecessary complexities and dead ends by going through each option and collecting feedback from customers.
Set Up Auto-Attendant with Global Call Forwarding
You can get our auto-attendant software, when you purchase any of our phone number plans. This means you’re not paying additional fees to use this communication feature. Then, you can set up an auto-attendant through our online control panel and modify it at any time.
Still need help with auto-attendant setup? Check out our step-by-step guide or call us at +1 (561) 908-6171. We’re here to help, 24/7!